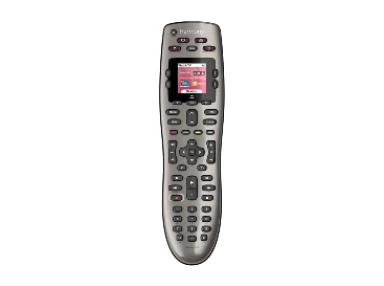
Having a home theater system is a great way to have entertainment at home. Unfortunately, each of the devices in this system comes with a remote control that sometimes you forget which remote control to use or take the wrong one because they look alike.
To avoid this kind of mistake, you need to merge them in Logitech Harmony 650 which requires Logitech Harmony 650 software in the set up process.
What is Logitech Harmony 650?
Logitech Harmony 650 is a universal remote that can control up to 8 devices that have infrared remote controls.
Therefore, you can get rid all of your remote controls and replace them with it. This universal remote is easy to use.
Once you set up this device, you can control your consoles, Blu-ray, televisions, and other device smoothly.
The Harmony 650 is powered by two AA batteries. However, this device does not come with rechargeable feature.
Therefore, you will need to replace them with the new ones when they go weak. But, it is okay if you want to use rechargeable batteries. You can charge them using a certain device.
When you buy this universal remote, there are a couple of things that are included in the package. One of them is USB cable. This cable will be needed to set this remote control.
How to Set it?
Harmony 650 cannot be used if you do not set it up first. In order to do it, you need Logitech Harmony 650 software and laptop or PC. You can follow these steps to set this universal remote.
1. Log on to Logitech official website via your laptop or PC and download Logitech Harmony 650 software.
2. Install this software and create an account if you are a new Logitech user. But, if you already have an account, you can log in directly.
3. Connect Logitech Harmony 650 to your laptop using the cable provided in the package of this universal remote.
4. Go to Add Devices page on the software and enter some information about your device, such as the type of the device, its manufacturer, and its model.
5. Go to Add Activities page and enter certain information about the Activities that you will use on this universal remote.
6. Wait for the software to finish transferring your setting to the remote control.
7. You can disconnect the remote control from your PC after the Finish Setup page appear on your PC screen.
Closing
Setting up this universal remote control is pretty easy. You will likely be able to set it up successfully on the first try if you follow the steps properly.
However, if you are a bit confused with those steps, you can check the tutorial first.
Logitech Harmony 650 for Windows
Compatible Operating System:
Windows 10 (32 bit / 64 bit), Windows 8.1 (32 bit / 64 bit), Windows 8 (32 bit / 64 bit), Windows 7 (32 bit / 64 bit), Windows Vista, Windows XP
Logitech Harmony 650 for Mac OS X
Compatible Operating System:
Mac OS 10.14, Mac OS 10.13, Mac OS 10.12, Mac OS 10.11, Mac OS 10.10, Mac OS 10.9, Mac OS 10.8, Mac OS 10.7, Mac OS 10.6
Logitech Harmony 650 Manual Download
1. Logitech Harmony 650 Setup Guide
- Format File : PDF
- Download File


